Last week I got a big envelope in the mail with my advanced copy of the Aug/Sept issue of Quilters Newsletter.
Back in April I did some samples and wrote about Gelli printing fabrics. If you read my blog regularly you will know that I'm a big fan of the gelli plates and use them for my gelli print daily and frequently for my weekly leaves. So check out pages 50-53 for my take on using gelli plates.
Also included in the article is my circles and curves quilt that is made entirely of round gelli prints cut into quarters.
The Weekly Leaf
This weeks leaf is the one that I did for the article, a gelli print of three violet leaves. The first photo shows the first print on the left which is just the outline or shape of the leaves. The second print which is the detail print is the one that I use for my weekly.
I save a lot of the shape prints and do machine stitching on them. This is the one I did for the article.
Week #28
Daily Stitching updates
Gelli prints #189-193
Shades of Orange #116-120
Linked to "Off the Wall Friday"
Showing posts with label Quilters Newsletter. Show all posts
Monday, July 11, 2016
Tuesday, September 23, 2014
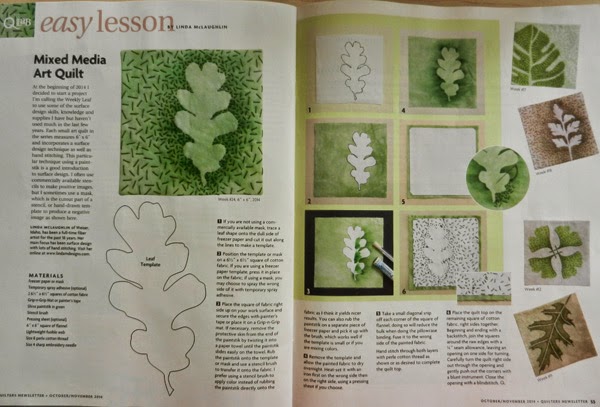
Published in Quilters Newsletter
Some of my weekly leaf pieces are in the newest issue of Quilters Newsletter, Easy Lesson section.
Mary Kate Karr Petras the editor that worked with me on this lesson also did a blog post on Sept. 18 about doing demos of the technique. She showed some of her samples and I love the way she has stitched them.
Yesterday was the start of the second week of SAQA's annual auction. Go check it out and bid on some great art quilts.
Although it is still very green around here, some of the leaves have already started falling so I guess autumn is really here. Speaking of leaves, when I pulled out my stamping samples for last weeks play day I found several leaf prints that I had forgotten about.
These inspired me to revisit this technique for this weeks leaf stitching. I've used a few of my hand carved stamps, freezer paper and Jacquard textile paint.
Every time I stamped a leaf onto my fabric I also did one on a piece of freezer paper.
While the paint dried on the fabric I cut out the leaf that was stamped on the freezer paper. It was then ironed on top of the leaf that was stamped on the fabric.
The next layer was stamped.
Freezer paper cut and ironed on.
This was repeated until I had finished stamping.
No need to cover the last stamp (lower left). Next step is to remove all the freezer paper to reveal the layered looking piece.
When you work this way the first image stamped will appear to be on top, and each successive layer appears to be deeper in the pile.
Week #38
Daily Stitching updates
Line Dance #261-#266
The Daily Paper #189-#194
Linked to "Off the Wall Friday"
Subscribe to:
Posts (Atom)